
date_range 04/03/2023 00:11
Well, it’s a been a while. So long in fact that I actually forgot how I had the site set up and couldn’t figure out how to actually add a new entry for about 15 minutes. Well, on the plus side, everything is up to date now. I don’t really do as much side projects anymore, I find doing 40 hours of full-time programming tends to discourage too much hobby projects and instead I just spend my free time doing more relaxing hobbies that don’t really take any real mental effort, like video games. I was inspired by a very...
date_range 09/04/2019 00:01
Unity Tiny - A Mini Project A few weeks ago I took an interest in a preview feature of the Unity game engine known as ‘Unity Tiny’. It’s basically a rewritten smaller core, the very base of which comes in at just 72kb. At time of writing it is has a few limitations and interesting bits about it. The Unity engine itself is primarily written in C++, with developers who use it interfacing with the engine via C# using the Mono runtime. Unity Tiny initially is actually written in TypeScript, at least until it migrates over to using C#. Secondly,...
date_range 23/01/2019 21:45
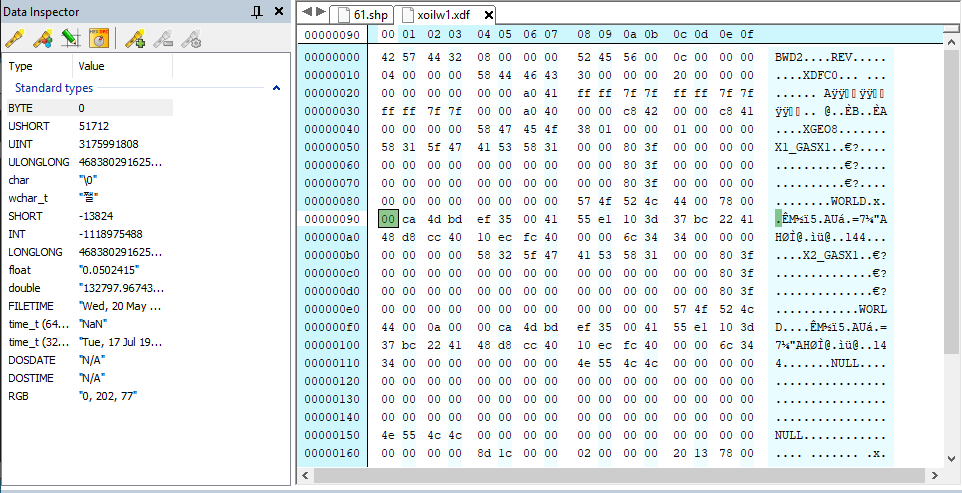
Reverse Engineering More Data Files Last week I spent a bit of time trying to reverse a few of the remaining data files that aren’t yet parsed in Open76. Looking at it now there actually aren’t many left. Right now the only notable one I can think of is the XDF file format and I’m already aware of what it is - it basically consists of the animated sprite effects; explosions, muzzle flashes, smoke, dust clouds, etc. Most of the data file exploring I’ve done is using a hex editor and scouring the internet for any references to other people...
date_range 19/08/2018 21:00
I assembled these findings after looking at the data files for a bit, certainly advancing my hex editor skills a fair bit. Interstate 76 has a variety of different file types. A large chunk are geometry & textures, there’s a few text files, some sound files and some more specific data files. One of the specific files I looked into recently were the GDF files. While it’s a rough guess, I’m guessing it stands for ‘Gun Data File’ or some sort, as they’re specific to the weapons that vehicles have. An asterisk before the offset indicates this extra data only...
date_range 12/08/2018 10:00
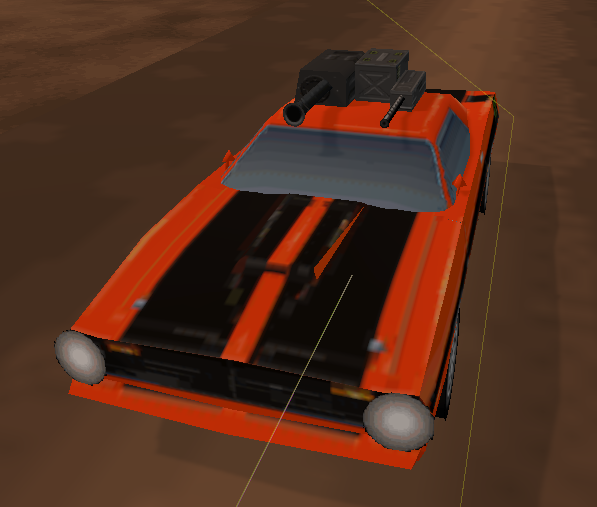
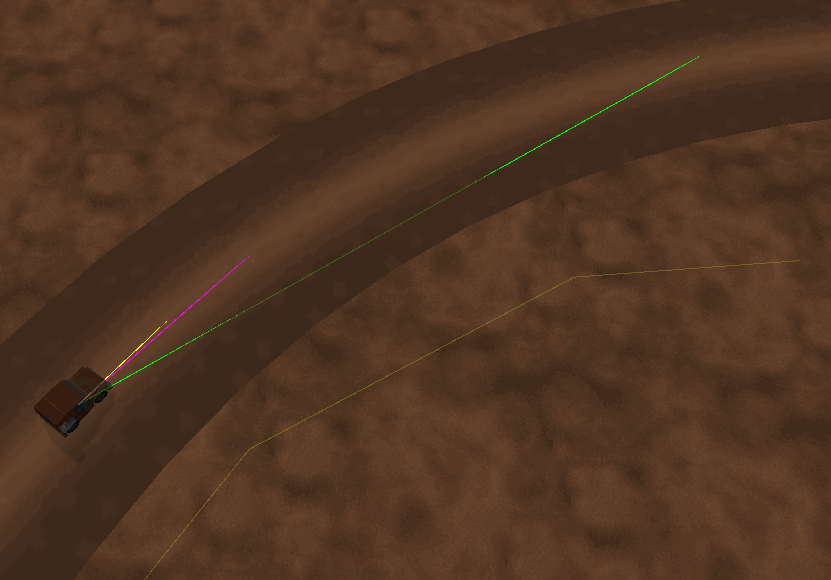
It’s been around 2 and a half years since the last entry, so it’s probably time for a new one. Recently I learned about a project called Open76. What it aims to do is basically get the game Interstate 76 working on modern machines using the Unity engine. Since I’m a big fan of the original game and I use the Unity engine at work, I figured I’d take a closer look. Interestingly this is the first Open Source project created by someone else that I’m contributing to as well. After replaying the entirety of the original game using the...
date_range 28/01/2016 22:16
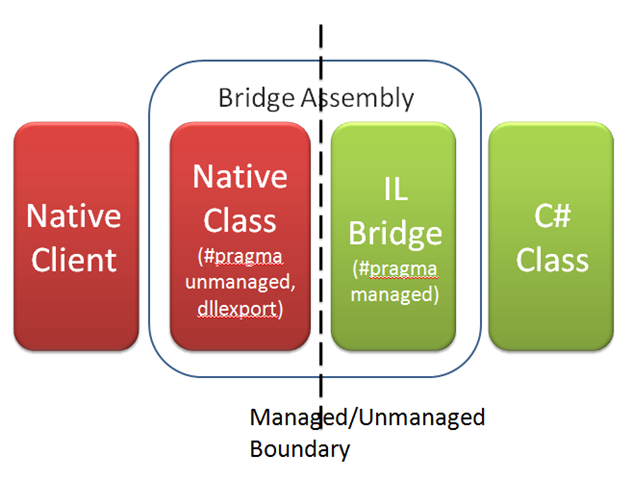
A bit more than a week on and I’ve made some good progress on my project. I’ve spend a bit less time on adding things which while unfortunately does mean the screenshot in my last post is more or less unchanged but there’s been a number of changes behind the scenes. The project has been split into three parts: The engine DLL An engine ‘runner’ / test application Unit test project This isn’t overly significant but provides a stable foundation for me to work with. One project is dedicated to all engine features and development, one for testing it, adding...
date_range 17/01/2016 21:43
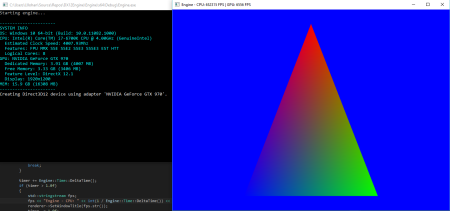
It seems appropriate to start with a ‘Hello world’-style triangle: Ever since details of DirectX 12 began to surface, I became interested in learning about it as most of my recent programming has been done through C# rather than C++, and the last time I worked with DirectX was very briefly with version 11 which had more of an emphasis of creating an abstraction layer above OpenGL/DirectX than an actual engine and prior to that, DirectX 9. My main problem was hardware capability as my 2009-released AMD 5870 was simply not compatible with DirectX 12, but after purchasing a GTX...
date_range 02/01/2015 02:13
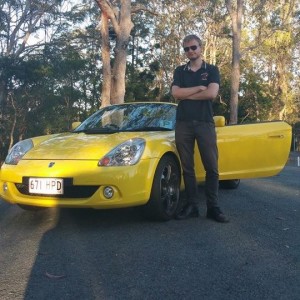
It’s been a year and a day since I’ve last posted. It’s 2AM and I’m not tired in the slightest so let’s write an update. Shortly after turning 21 I bought myself a new car that soon became a huge part of my life ever since. It was from this moment on that I first held a wrench, my first sports car, my first convertible, and essentially it became my most treasured possession, surpassing my previously most useful companion, a computer. Over the next few months I have started to personalise the car to my liking by modifying it in...

date_range 01/01/2014 19:31
I had a bit of play with streaming services today and was interested in getting Netflix working on a media server I’ve got set up. After some confusion, tinkering and satisfaction everything was eventually working. The only problem was that now Australian based streaming services were no longer available. A workaround was to manually edit the DNS address on the device, but doing this with a TV remote isn’t the most sophisticated of methods. The next idea was to simply point the DNS address to the router and have that changed, much faster on a computer. There was still the...
date_range 21/12/2013 16:56
On the 9th of December I officially started work for a small software development company based in Brisbane, located on the western edge of the city in Paddington. It’s been an interesting few weeks, starting with a somewhat anxious feeling despite the relaxed environment and leading to a somewhat more comfortable work environment after beginning to realise the cheerful people and a dynamic set of work. Having started rather late within the year I’ve spent two weeks getting used to the software I’ll be working with and taking in all kinds of new knowledge straight away. Tasks have been varied...